
As you launch Photoshop on the iPad, you can view the home screen of the app. From the home screen, you can start creating your composites or documents and proceed to the editing workspace.
- Home: Use the Home icon
 to switch back to the home screen from the editing workspace at any time.
 - Learn: Access an interactive app tour and hands-on tutorials to help you explore what’s different when you use Photoshop on the iPad and understand common workflows.
- Cloud documents: View a list of all saved cloud documents in Photoshop, whether created in Photoshop on your iPad or desktop.
- Deleted: Accidentally deleted a file? No worries!
- Create new: Easily create a new document with the option to name the document, set the canvas dimension, change orientation, select resolution and choose black, white or transparent background color.
- Import and open: Quickly import and open your document from the Camera Roll, Files, or take a new photo with your iPad’s Camera.
- Suggest a feature: Suggest features you would like to see in future releases of Photoshop on the iPad.
- Recent: Use the Recent section to access all the documents you worked on recently.
- App Settings: Tap to set your preferences while working with Photoshop on the iPad.
- Cloud docs help: Tap to check whether you’re online or offline, and the save status of your cloud documents
 to switch back to the home screen from the editing workspace at any time.
 to set your preferences while working with Photoshop on the iPad.
Header bar
A. Home: Use the Home icon () to switch back to the home screen from the editing workspace at any time.
B. Filename: Displays the name of the document currently open.
C. Current zoom level: Displays the current zoom level of the open document.
D. Undo: Reverts the last action performed.
E. Redo: Restore the last action undone.
F. Cloud docs help: Check whether you’re online or offline, and the save status of your cloud documents.
G. Send to: Use the Send to icon to save and send your work to Photos, Files, or Share.
H. Help: Tap the help icon to browse tutorials, take the in-app tour, view shortcuts, check the Photoshop user guide, reach out to the community forum, and share your feedback with Adobe.

A. Home B. File name C. Current zoom level D. Undo E. Redo F. Cloud docs help G. Send to H. Help
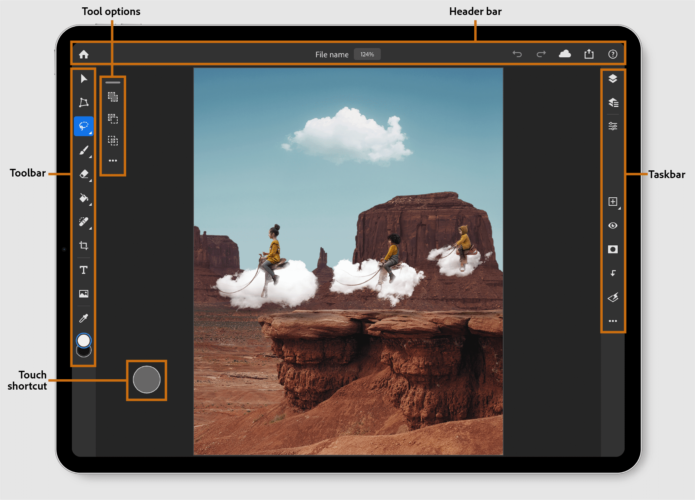
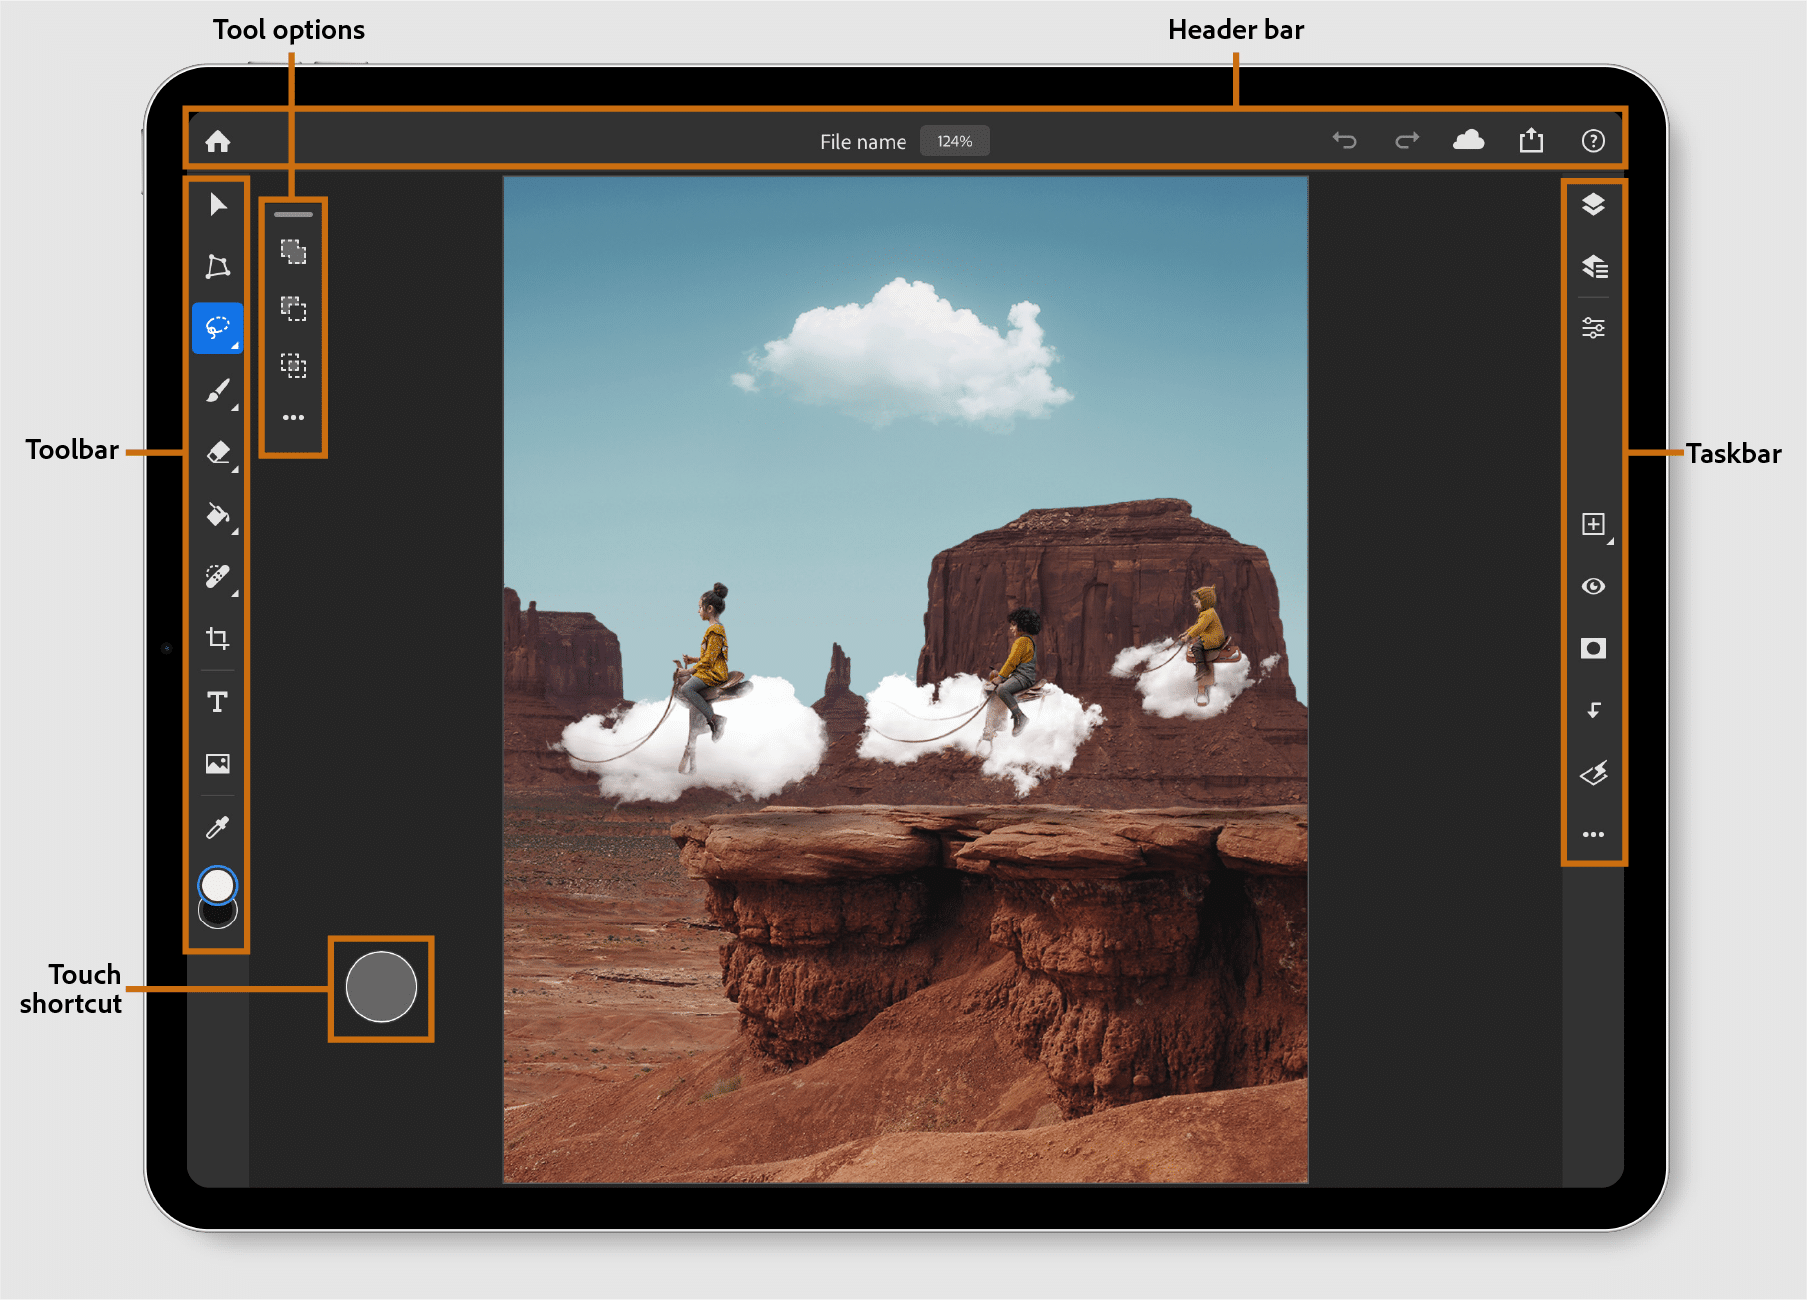
As soon as you open a document, you will enter into the editing workspace and your creative work can begin. The canvas displays the area where you interact with your open document. Photoshop on the iPad offers you a context-aware user interface. Core tools and tool options are contextual and surface only when you need them.
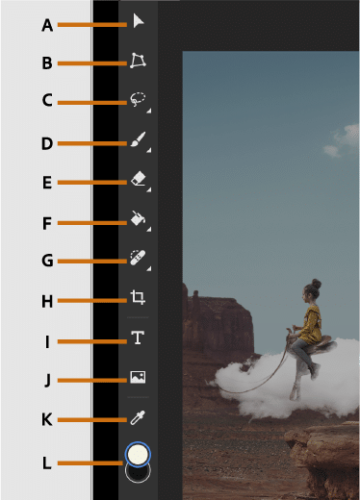
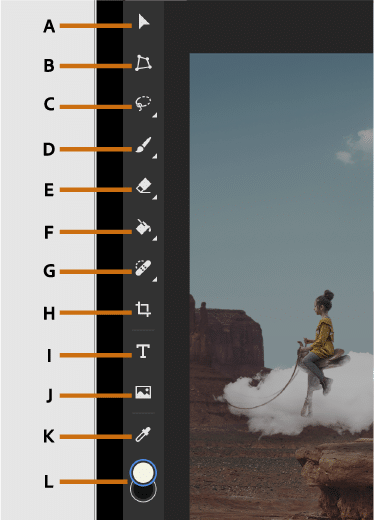
Toolbar
A. Move B. Transform C. Select D. Brush E. Erase F. Fill G. Heal H. Crop I. Type J. Place Photo K. Eyedropper L. Color chip
A. Move: Move selections and layers.
B. Transform: Apply various transform operations to the selected layer or object.
C. Select: Make a selection with the selection tools—Lasso, Quick select, Rectangular marquee, and Elliptical marquee. Long press icon to reveal all selection tools.
D. Brush: Apply brush strokes and control brush settings.
E. Erase: Remove portions in your photo where you apply the eraser brush strokes.
F. Fill: Fill the active selection with the foreground color. Long press icon to reveal the Gradient tool.
G. Heal: Retouch and fix imperfections with the Heal tool. Long press icon to reveal the Clone stamp tool.
H. Crop: Crop your selection, and choose to rotate and recenter.
I. Type: Create a type layer to add text.
J. Place photo: Add photos from Camera Roll, Files, Libraries, and Camera.
K. Eyedropper: Easily change foreground color by sampling from any layer.
L. Color chip: View the selected foreground and background colors in the color chip. Swipe vertically to switch between the two colors. Tap the color chip to choose a new color from the color picker that appears.
Note: Long press the icons that have triangles on the bottom right to reveal more tools.
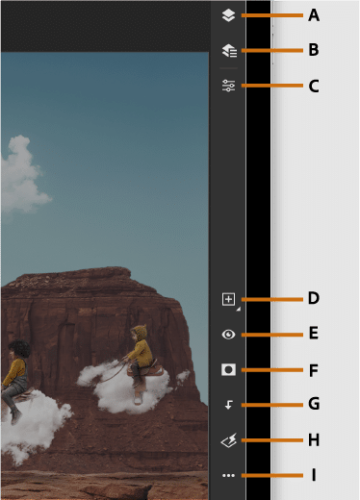
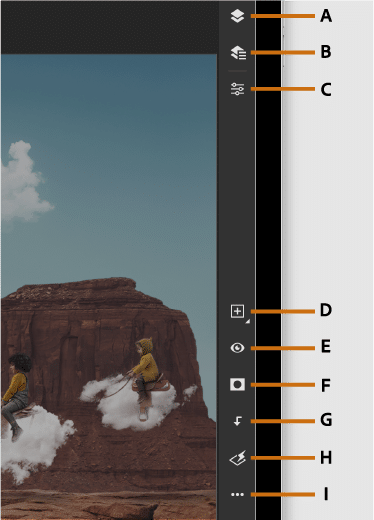
Taskbar
A. Compact layer view B. Detail layer view C. Layer properties D. Add new layer E. Layer visibility F. Add mask G. Add clipping mask H. Filters and adjustments I. More layer actions
A. Compact layer view: See all the layer thumbnails in a simplified view.
B. Detail layer view: See an expanded layer stack with masks, layer names, visibility, and group contents.
C. Layer properties: View blending options, adjustments, and dimensions for the type of layer selected (type, pixel, adjustment, and so on).
D. Add layer: Insert a new layer. Long press for more options — add a new layer, adjustment layer, or empty group.
E. Layer visibility: Control layer visibility.
F. Add layer mask: Add layer masks to hide or reveal portions of a layer.
G. Add clipping mask: Add clipping masks to hide or reveal portions of a layer based on the layer below.
H. Filters and adjustments: Apply various filters and adjustments to the selected layer.
I. More layer actions: Reveal more actions you can perform with layers.
Note: Long press the icons that have triangles on the bottom right to reveal more tools.
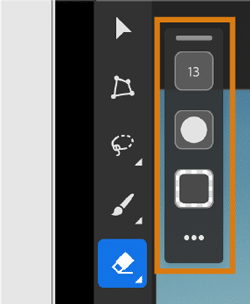
options
You can control the settings of your selected tools using the tool options. Tap a tool icon to bring up the tool options.
Hold and drag the grabber at the top of the tool options to move it around the canvas. You can also dock tool options by dragging it to the bottom of the toolbar and releasing.
Note: All tools do not have tool options.